Introduction
While I typically use Gitlab to house my git repositories, I have been looking for a much lighter solution that can be installed as a Docker container on a Raspberry Pi 4. I wanted a solution that was lightweight, open-source, and cross-platform. After some research, I found the perfect solution to install Gitea on Raspberry Pi. A Gitea Docker container.
What is Gitea?

Gitea describes itself as a “painless, self-hosted Git service” and it’s not wrong. It’s pretty painless. Gitea is a self-hosted git service that is similar to Github. It is also a super lightweight, software package when compared to Gitlab.
The Gitea Docker container used in this tutorial is compatible with the Raspberry Pi 4 architecture (Linux/arm/v7). This container also has SQLite built-in which is perfect for one or two users and a small number of repositories.
If you would like to use the official Gitea image (amd64) you can find it on the docker hub here.
Installation
This tutorial assumes that you have Docker installed on your host system. If not, you can view the “Quick and Easy Steps to Install Docker“.
Create a Volume
In order to ensure that your data and configuration for Gitea remain in place after container restarts and updates, a volume must be created within Docker. In order to create a Docker volume use the command below. This command will create a docker volume on your system called gitea.
docker volume create gitea
Docker Run Command
Now it is time to run the Gitea Container in Docker. Just copy and paste the below Docker run command into your terminal and hit enter.
docker run \
-p 3000:3000 \
-p 22:22 \
-v gitea:/data \
--restart always \
kunde21/gitea-arm:latest
This command exposes ports 3000 in order to visit the application in the web browser. It also exposes port 22 in order to perform SSH functions. The container is set to map the gitea volume that was created in the previous step to the /data folder within the container. Finally, the container will restart automatically.
Docker Variables
The variables in this container are summarized in the below table.
-p 3000:3000 | Exposes port 3000 and maps it to Port 3000 on the container. |
-p 22:22 | Exposes port 22 and maps it to Port 22 on the container. |
-v gitea:/data | Maps the docker volume named gitea to /data within the container. |
--restart always | Will ensure that the container restarts if it is every stopped for any reason. |
kunde21/gitea-arm:latest | The image from the Docker Hub. |
Initial Setup and Configuration

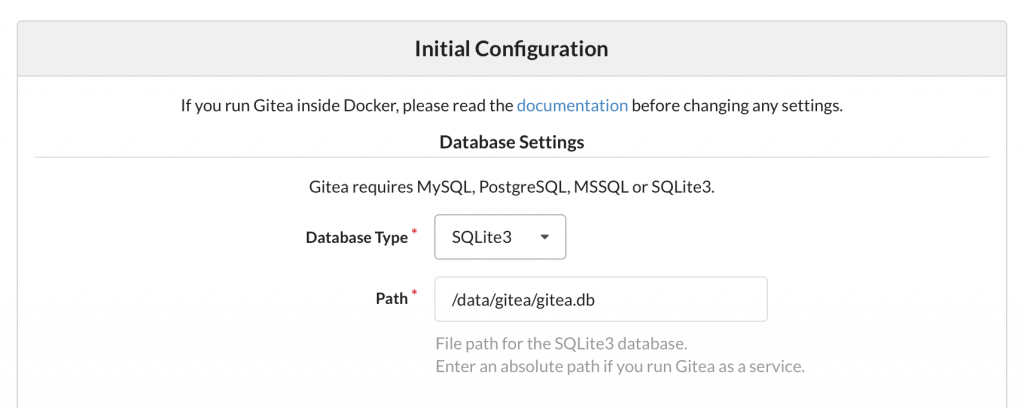
Once you have your new Gitea Docker container up and running, you can visit the application by pointing your web browser to http://yourdockerhost:3000. When you arrive and click sign-in you will be brought to the initial configuration page. You can choose the SQLite3 database option or connect the container to another SQL database server.
After you fill out your database information, you will be asked to fill out general settings such as your new site name and base url. In addition, you will fill out the username and password for the account that will become the administrator account.
For a secure setup, it is recommended that you disable self-registration which will ensure that only the administrator account can create new accounts. You can also enable local mode to prevent the use of all third-party content delivery networks. This will ensure that the application will serve all resources locally.
Success
Now that you have your own Gitea Docker container running, you can start working on your projects on a server that you control, without having to rely on external services or applications. You can also configure Gitea to create mirrors of your Github/Gitlab repositories which allows it to serve as a backup.