Introduction
So you’ve finished installing and configuring Portainer, and now you are ready to dive in and see what it can do. Portainer is a simple and lightweight, but powerful application that is used to provide a web management interface that you can use to perform functions on your Docker host. This guide aims to help answer some basic questions about how to use Portainer.
Using Portainer to Manage Docker

Once you login to Portainer you will be presented with the home screen. If you set-up Portainer properly, then you should see your local docker server on the screen. You can click that server to view your dashboard.
The main navigation menu is in the left sidebar. From the sidebar, you can view your dashboard, running containers, volumes, networks, images, and more
How do I View my Container Status?
To view the status of your running containers, click the Containers link on the left sidebar. If you have containers running, your screen will look similar to the image below.

At a glance you can see important information such as name of the container, state of the container, the image that the container is using, the the containers internal IP address, and the exposed container ports that you can access.
From this screen, you will be able to perform most of the basic functions to control your containers.
How do I run a container?

In order to run a container, you can click the button labeled + Add container. Once you click the button you will be directed to the “Create a container” page.

Name & Image
This is the page that you will begin entering the details of the container you would like to run. The name field is equivalent to --name flag in a typical Docker run command. You can use the image field to type in the name of the image from the Docker Hub that you would like to run. Selecting “Always pull the image” will ensure that you pull the latest image from the hub rather than using an older, out of date image that may be on your system.
Ports
Next you can choose if you want to publish all network ports that are exposed by the container to random host ports. This will randomize the ports that the host system uses to map to the container every time the container restarts. If you enable this option and the points port 80 in the container to port 7840 then you will have to access your container by visiting http://dockerhostip:7840. Keep in mind that if the container is recreated after it is stopped you will be given a different port number that replaces port 7840 causing you to lose access to your application at the previous port.
Manually mapping the ports to the container will ensure that the ports mappings remain persistent if you would need to stop and restart the container. You can map your ports manually by clicking the “publish a new network port” button on the create a container screen. Once the button is clicked two fields will pop up for you to fill out.

Type the port number that you would like exposed from the host system in the “host” field and in the “container” field, type the port number that the host container needs to be mapped to.
For example, if you are running a container that contains a web application that needs to be accessed on port 80. You would type 80 in the container field. You can choose any unused port on the host machine to map to the container port. Let’s use port 8080. Now, once the container is up and running, we can access the web application at http://dockerhostip:8080.
Using this function in Portainer is equivalent to the -p flag in the Docker run command.
If you don’t have any advanced settings to configure such as adding persistent volumes, changing the networks or adding environmental variables then from here you can click “Deploy Container” to run your container.
Advanced Container Settings
If you continue to scroll down on the “Create a container” page you will see the “Advanced Container Settings” section.

Below is a table that outlines the functions in the “Advanced Containers Settings” section.
| Tab | Description |
|---|---|
| Command & Logging | Allows you to specify a startup command, entry point, working directory, and user on container startup. You can also specify if you need the container to run in interactive, detached, TTY, or multiple modes. |
| Volumes | Allows you to map volumes to your container (the -v flag within the Docker Run command). It also allows you to bind directories on the host machine to directories within the container. In addition, you can make a volume read-only. |
| Network | From here you can determine which available network on the host system that you want your container to be connected to. You can also add a hostname, domain name, mac address, IPv4 or IPv6 Address, and a Primary and secondary DNS Server. You can also add entries to the containers hosts file from this tab. |
| Env | Within the “Env” tab you can add environmental variable to your container. When you click the “add environmental variable” you will be asked to enter your variable name and value. This is equivalent to the -e flag within the Docker Run command. |
| Labels | This tab allows you to add labels to your container. When you click the “add label” you will be asked to enter your label name and value. This is equivalent to the -l flag within the Docker Run command. |
| Restart Policy | From here you can determine your container restart policy. You can select none, always, on failure, and unless stopped. |
| Runtime & Resources | This tab will allow you to configure the containers runtime & resource information. From here you can select to run the container in privileged mode, configure the runtime, attach devices from the host, and lime the amount of resources on the host that the container is allowed to utilize. |
| Capabilities | From this tab you can select a multitude of capability options to add to your container. The available options include, but aren’t limited to net_admin, net_broadcast, audit_write, and audit_control. |
How do I use the Application Templates in Portainer?
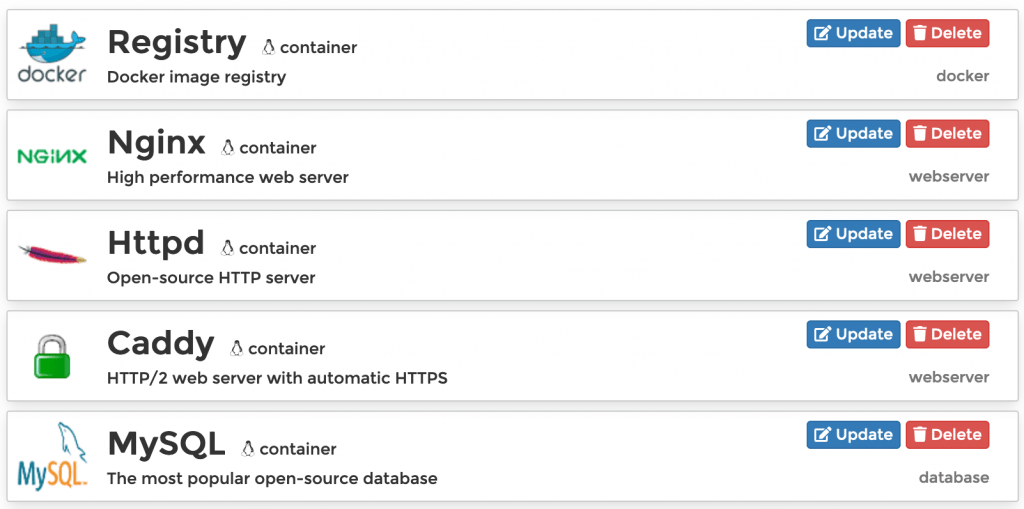
If you don’t want the hassle of running a container from scratch then you’re in luck! Portainer has a preset list of application templates to that pre-fills out the “Create a container” form for you. Just click on “Application Templates” in the left navigation sidebar, click the application you want to run, fill in the name field, and click deploy.
A few seconds later, your new application will be up and running and ready to access.
How do I Start & Stop Containers?

To issue basic start and stop commands to your containers, click on “Containers” in the left sidebar of Portainer. Next, tick the box to the left of the container and then select the function you want to perform from the function bar (as seen above). From this bar you can start, stop, kill, restart, pause, resume, and delete any of the containers on your docker host.
You can also click on the name of the container. Once you are on the container details page, you can select the function that you want to perform on the top bar as well.
How do I Create and Manage Volumes?

To manage your docker volumes click on “Volumes” in the left navigation sidebar. From here you can see all of the volumes on your Docker host. If you would like to view the details of a volume, just click the name of the volume. Once you open up the volume you will see a screen similar to the screenshot below.

From here you can see the name of the volume and delete the volume from your system if you need to. In addition, if you are using the NFS driver you will see an additional section that looks like the screenshot below.

From here you can see the NFS link and options string that is being used. You cannot make changes to volumes in Portainer once they are created, you can only delete them.
How do I Pull and Manage Docker Container Images?
You are able to download container images from Docker Hub into your docker server by simply clicking on the “Images” link on the left navigation sidebar. You will see a screen like the one in the screenshot below.

You can pull the image by typing the image tag in the “image” text field. It should be in the format of username/image_name. Once you type in your docker image tag, click “Pull the image”. This will download the image to your docker host.
In addition to downloading images to your docker host, you are also able to manage the images that are already on the host. Once you have a few containers running, you will see them in a list like the one below.

From this list you can click on the ID of an image to learn more information about the image. You can also tick the box to the left of the image name and click remove image.
Make sure to check your image section often. When you delete containers from your system, the images still stay stored on the Docker host. This can quickly take up a lot of disk space if you run and experiment with a lot of different containers.
How do I Create and Manage Networks?
In order to manage your networks in Docker, click on the “Networks” link on the left navigation sidebar. You should then see a screen that looks similar to the screenshot below.

If you need to delete a network from your system, just tick the box to the left of the network name and click the remove button.
In order create a new network on your Docker host click “Add network”. You’ll then be taken to a screen that will allow you to quickly add your network.
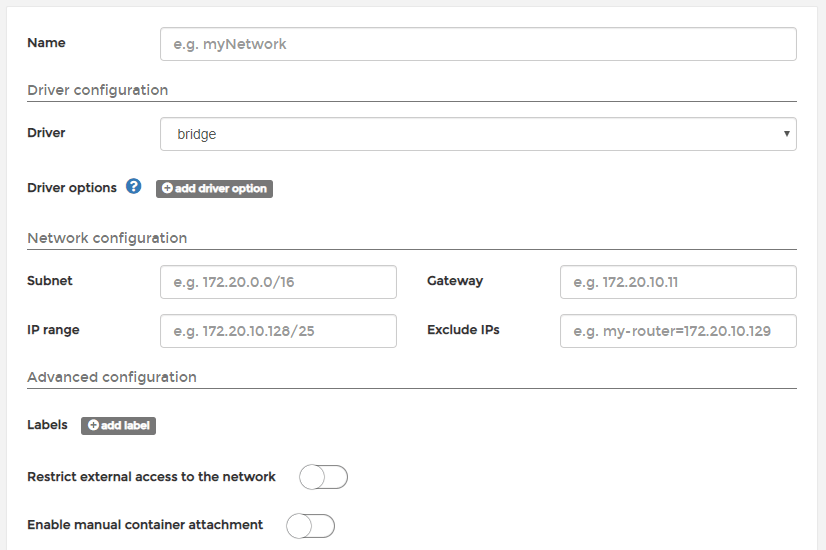
In the name field, type out a name for your new network. Next, you can select a driver. You can choose between bridge, host, ipvlan, macvlan, null, and overlay. More information about the network drivers here.
After you select your driver, you can begin adding your network information such as the Subnet, IP range and Gateway. Under the advanced configuration section, you can configure labels, determine if you would like to restrict external access to the network, and enable manual container attachment.
How do I Attach Networks to Running Containers
If you have manual container attachment enabled on one of your networks. You can go back to the container list by clicking the container link in the left navigation sidebar. After you see yours list of containers you can click the name of one to view it’s details. When you scroll down to the bottom of the page, you will see a section called “Connected networks” that looks like the screenshot below.

To attach one of your newly created networks from the container, click the “Join a network” drop down list, select your network, and click the “Join network” button.
How do I View Container Logs?
Portainer also allows you to view container logs so you can diagnose problems and ensure that your container is running correctly.
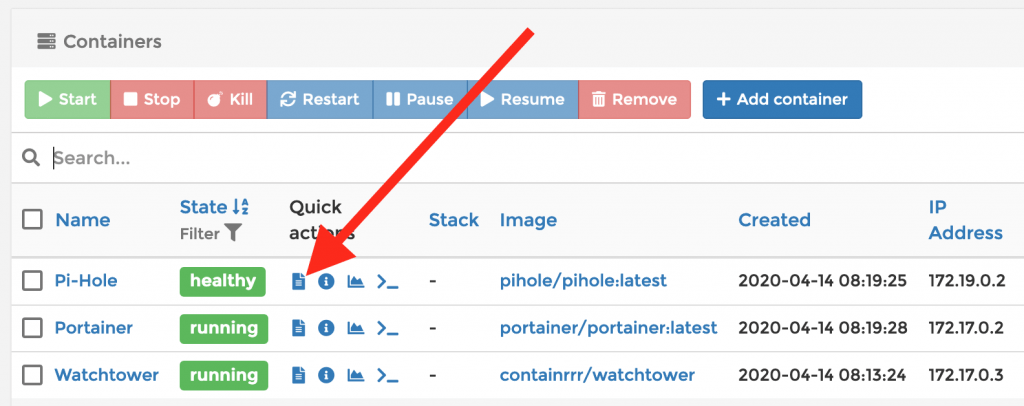
In order to view the logs, click the paper icon in the quick actions column as indicated above. Once you click the button you will be directed to the log viewer page. From here you can view the logs and adjust the log viewer settings.

You can also get to the log viewer page by clicking the “Logs” icon as seen below within the Container Details page.

How do I Access the Console within a Container?
If you would like to access the console within a container, it can be done with Portainer as well. This time click the “>_” Icon within the Quick actions bar on the Container dashboard as seen below.
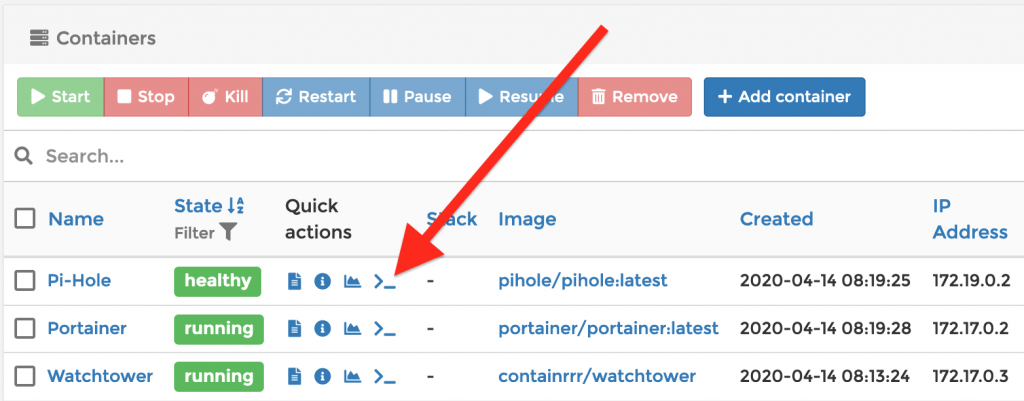
Once you click the icon, you can click the “connect” button on the next screen. You’ll then be taken to the terminal window.
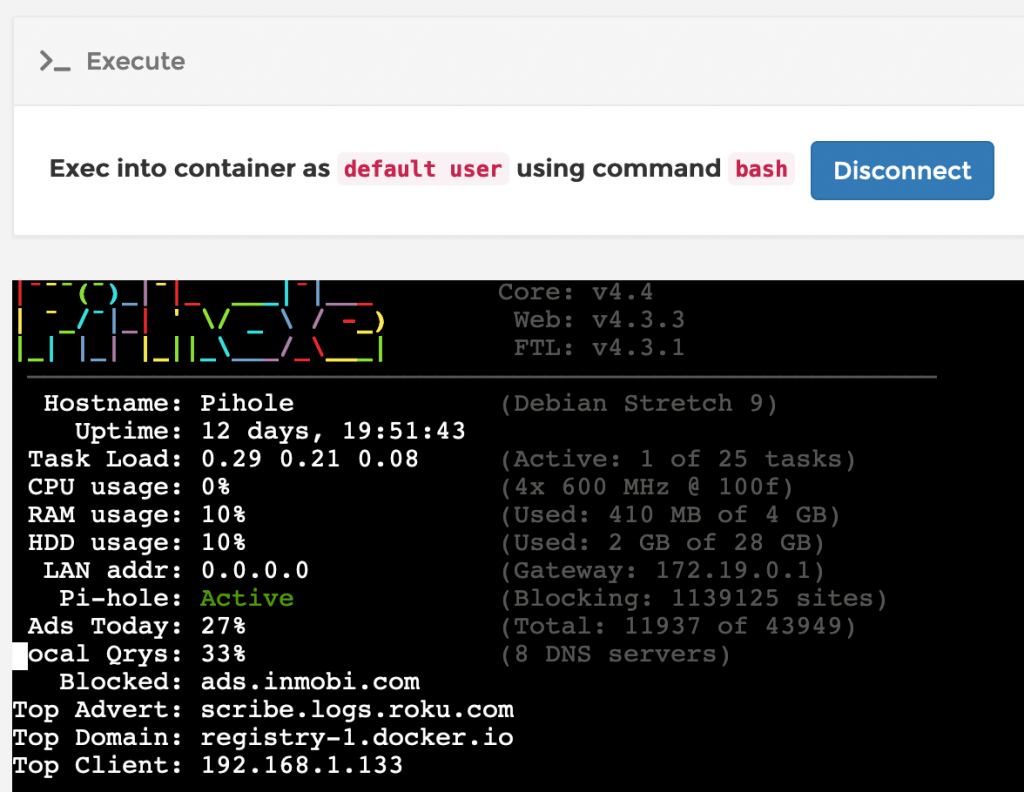
As you can see I ran the pihole -c command on my instance of Pi-Hole. Having access to the console is super helpful if you are away from your network and have Portainer running behind a reverse proxy.
You can also get to the log viewer page by clicking the “Console” icon as seen below within the Container Details page.

How do I View Container Statistics?
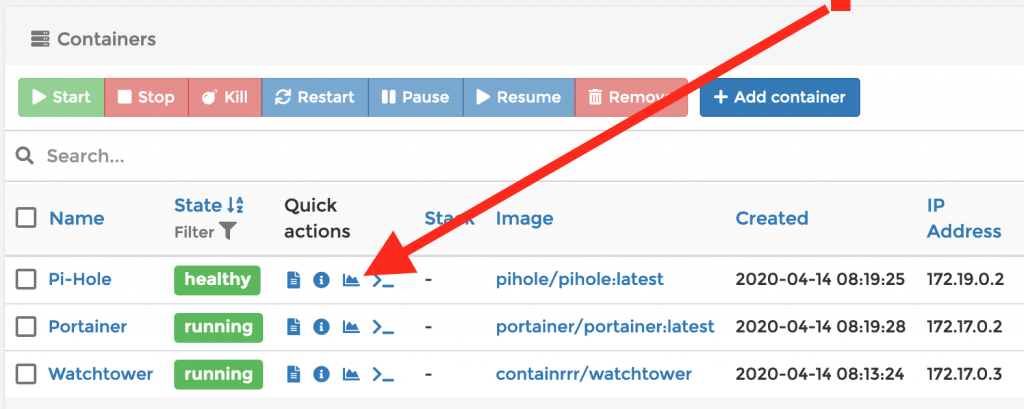
You now have your container up and running in Portainer, but how can you monitor it’s resource utilization on the host? Simply click on the graph icon within the quick actions column in your running container within the container dashboard. As shown above.

From this screen you will be able to view your the memory, CPU and network usage of your container. You can easily change the automatic update duration by selecting how many seconds you want the stats to update at the top of the screen.
If you scroll down, you will see is view a list of running processes. This allows you to diagnose what command or process is using up the resources on your docker host from within the container.
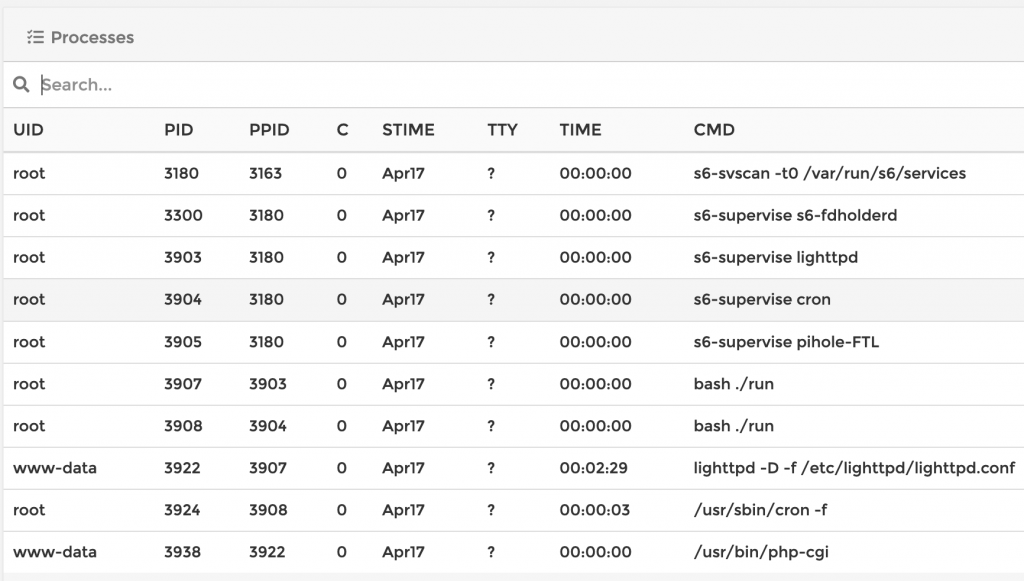
You can also get to the log viewer page by clicking the “Stats” icon as seen below within the Container Details page.

How do I Create a new Container Image?
If you make modifications to a running container within Portainer, you can easily update the image on your local system. All you have to do is go to the container details of any container within the container dashboard and scroll to the “Create image” section. This will allow you to quickly create and save an image to the docker host from the running image.
You can create an image by typing in whatever image tag that you come up with and clicking the “Create” button.

After docker saves the new image, you can view it in the image management dashboard. If you need to run it, just type the tag name on the “Create a container” screen within the container management dashboard.
You can then view and manage your newly created container in the Image Management Dashboard by clicking “Images” on the left navigation sidebar.
Conclusion
Overall, Portainer is a simple, but powerful application that makes controlling and managing Docker very easy for those of you who prefer not to work with Docker via the terminal. I place Portainer behind a reverse proxy in order to be able to easily access it from outside of my home network. This allows me to control my services remotely should something go wrong.
If you would prefer to learn the docker terminal commands, you can view the 25 Basic Docker Commands for Beginners in order to get a head start on learning Docker. That article will give you a head start in learning the basic commands that you will need in order to start controlling Docker via the command line interface.
If you have any questions or suggestions, please feel free to leave a comment below.
The post, Huge Guide to Portainer for Beginners appeared first on Codeopolis.
Thank you for creating this guide. It is awesome.
Your my hero !
This made things so much easier.
Thank you
I’m so happy it helped you!
I’m struggling and can’t find this info anywhere… how do you “link” containers?
I have a guacamole container that I need to link to guacd and mysql… but there’s no option or clear guidance on how to achieve that with Portainer.
Do you know how I can achieve that?
Thanks!
thanks for this post.
it helped me actually.
but Can you please explain a bit about the stacks and Host pages?
thank you very much.