Introduction
When you need to make a quick adjustment to your docker setup, you just fire up your favorite terminal app and start typing in the various commands. Using the command line to manage your Docker setup is pretty simple, but some people prefer a more visual user interface when managing their systems. Portainer gives you that visual interface.
What is Portainer?

Portainer is an open-source application that provides a web interface that you can use to manage your Docker host. You can use the web-based interface to view the status of your containers and issue simple commands to the Docker host to control those containers. Additionally, you are able to view the logs of your containers and access the container console to execute commands from within your web browser.
Portainer can be used to manage and create volumes and networks in Docker as well. Volumes can be created and deleted with ease. You can use the application to create regular Docker volumes and NFS share Docker Volumes. Networks are managed just as easily. You can create advanced Docker networks using various built-in drivers and manage those networks.
Another awesome feature of Portainer is its Application Templates List. You can use this list to automatically create and run containers of popular services such as Nginx, MySQL, Joomla, Jenkins, and Redmine.
Finally, you can use Portainer to deploy and manage applications to a Docker Swarm (Kubernetes management is in Beta).
Running Portainer in Docker
Installing Portainer is easy and can be done by running the following Docker commands in your terminal. This tutorial assumes you have Docker installed. If you need to install it on your system, you can view the quick and easy steps to install Docker, here.
Create a Volume
Portainer requires a volume to be created in order to persist data across container updates and restarts. Running the below command in terminal will create a volume on your Docker host named portainer_data.
docker volume create portainer_data
Install Portainer with a Docker Run Command
The below command will create and run a container in Docker that will host the Portainer application.
docker run -d \
-p 8000:8000 \
-p 9000:9000 \
--name=portainer \
--restart=always \
-v /var/run/docker.sock:/var/run/docker.sock \
-v portainer_data:/data \
portainer/portainer
The new container will be named portainer and will open up ports 8000 and 9000 on the host and bind them to their respective ports within the container in order to allow access to the application. The container will mount the volume we created above, portainer_data, and bind it to the /data folder within the container. The container will connect directly to the Docker host via a volume that binds to the Docket socket at /var/run/docker.sock. Finally, the container will be configured to restart always. This will ensure the container restarts automatically should it crash, and start when the Docker host machine is booted up.
| Variable | Description |
portainer/portainer | The portainer/portainer image within the Docker Hub. |
--name=portainer | Names the container “portainer” |
--restart=always | Starts and restarts the container automatically. |
-p 8000:8000 | Exposes port 8000 and binds it to port 8000 on the container for the Portainer Edge Agent. |
-p 9000:9000 | Exposes port9000 and binds it to port 9000 on the container for the Portainer Management UI. |
-v /var/run/docker.sock:/var/run/docker.sock | Binds the /var/run/docker.sock to the Docker host at /var/run/docker.sock |
-v portainer_data:/data | Binds the volume portainer_data on the Host to /data within the container. |
| -d | Runs the container in detached mode. |
After you run the command to install Portainer, your output should look something like this:
Unable to find image 'portainer/portainer:latest' locally
latest: Pulling from portainer/portainer
d1e017099d17: Pull complete
860ebb866910: Pull complete
Digest: sha256:
Status: Downloaded newer image for portainer/portainer:latest
pi@raspberrypi:~#
Now that your new Portainer container is up and running, you can access it at http://dockerhostip:9000.
Configuring Portainer

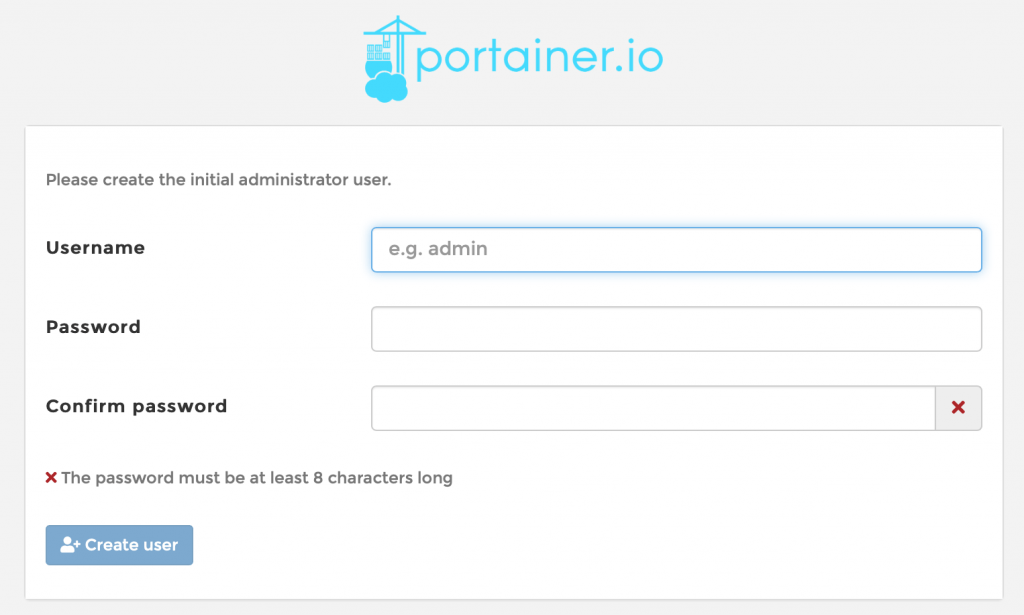
When you access Portainer for the first time you will be asked to create the initial administrator user. Fill in this form and click Create user.
Next, you will be asked to select the type of Docker environment that you want to manage. Select the Local button because we want to manage our local Docker Host.

Once you select Local click the Connect button.
Success!
The Portainer installation is now complete and you now have control of your local Docker environment with a web-based management user interface. If you want to continue to learn about Portainer, check out the Huge Guide to Portainer for Beginners.
If you have any questions about this process or this post please leave a comment below.
The port is 9000
“” Now that your new Portainer container is up and running, you can access it at http://dockerhostip:8000 “”
Oops, I always got those mixed up for some reason. I got it changed. Thank you for letting me know!