About Monica CRM
Monica CRM is an open-source, easy to use relationship manager for your contacts. CRM stands for Customer Relationship Manager, but Monica CRM is more of a personal relationship manager. It allows you to organize important information about your friends and family and can send you reminders of important events, such as birthdays and anniversaries.
This article is going to walk you through installing Monica CRM using the stacks function in Portainer. Docker and Portainer are the only prerequisites for this install.
1. Login to Portainer

First login to your portainer dashboard. This application is going to be installed via the “Stacks” option on the portainer sidebar. Click Stacks.

You will be presented with the stacks dashboard that outlines all the docker-compose stacks that you have running on this docker host.

To create a new stack, click on the “Add stack” button.

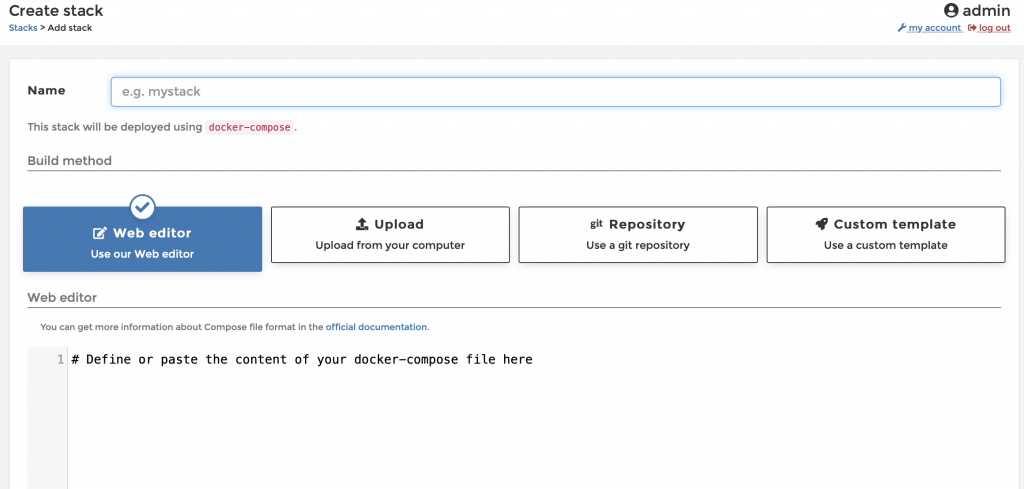
You will be presented with the “create a stack” screen that includes a web editor for your docker-compose file as shown below:

Once on this page, create a name for your stack. I called mine “Monica”.
2. Run Docker-Compose File in Portainer Stacks
Next we will pull the docker-compose file from the project’s GitHub page and paste it into the stacks web editor on Portainer.
The below text has been taken from the Monica CRM GitHub page.
version: "3.4"

services:
  app:
    image: monica:apache
    depends_on:
      - db
    ports:
      - 80:80
    environment:
      - DB_HOST=db
      - DB_USERNAME=monica
      - DB_PASSWORD=secret
    volumes:
      - data:/var/www/html/storage
    restart: always

  db:
    image: mysql:5.7
    environment:
      - MYSQL_RANDOM_ROOT_PASSWORD=true
      - MYSQL_DATABASE=monica
      - MYSQL_USER=monica
      - MYSQL_PASSWORD=secret
    volumes:
      - mysql:/var/lib/mysql
    restart: always

volumes:
  data:
    name: data
  mysql:
    name: mysql
Copy and paste the above docker-compose.yml file into the stacks web editor on Portainer as seen below.

This docker-compose setup will create two containers on your docker host. One is an Apache web server container that hosts and serves the application. The second container is a MySQL database container that stores and serves the data for the Monica CRM application.
Although not required when hosting internally, to better secure your setup, you can change a few of the listed database environmental variables. In the application container, change the DB_USERNAME and DB_PASSWORD variables to secure your installation. Make sure that you change the MYSQL_USER and MYSQL_PASSWORD variables in the MySQL database container to match what is in the application container.
This setup will deploy the service and make it accessible on port 80. If port 80 is currently being used by your system, you may want to change the exposed port from port 80. To do this, change the first number of - 80:80 under ports: in the file to the port of your choice. For example, if you want to access the application on port 8087 instead of port 80, you would change the file to - 8087:80.
Once you have the file configured, you can scroll down in Portainer and click the “Deploy the stack” button.

Once you click this button, Portainer will pull both container images from the docker hub and then run them with the configuration that you specified in the file.
After the stack is deployed you will be taken to the stack details screen which outlines the containers that you have running that are part of this stack.

Wait 3 or 4 minutes to allow the containers to perform their initial startup. Then you can access the application by visiting your published port.
3. Quick Setup and Walkthrough
Once you access the application, you’ll be presented with the below screen:

The above screen will allow you to create the first account within Monica. This account serves as an admin account which will allow you to change application settings.
Once you click register, you’ll be presented with the Monica dashboard.
Now you can begin by adding your first contact. Click on the “Add your first contact” button.

You will be taken to the add contact screen.

Filling this out and clicking the “Add” button will create your first contact. When your first contact is created, you will be directed to the page for the new contact as shown below:

From here you can begin to add additional information about the contact such as the conversations that you had with the person, their address, how you met, the names of their pets, and other contact information. Additionally you can log recent phone calls, conversations and keep track of the activities that you have done with that person.
Installation Video
That’s it!
Monica is a great way to keep track of your personal relationships in a self-hosted environment. If you would like to know more about the application, you can visit the Monica website here.